

how to draw a water drop
Sweat and tears produce the expressions of your character.
Dewdrops express the freshness of vegetables and fruits.
These sweat and tears, or water drops similar dewdrops, are ane of the techniques that bring out the appeal of illustrations.
Hither, we introduce how to draw such water drops.
1.Characteristics of h2o drop you should know
i-1.How to add calorie-free and shadow
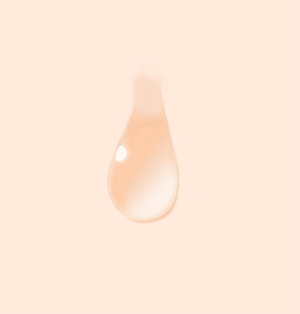
A water drop is a land when "transparent h2o" becomes a single driblet of water.
Light travels through transparent objects, so you add light and shadow differently than ordinary objects.
[Ordinary objects]
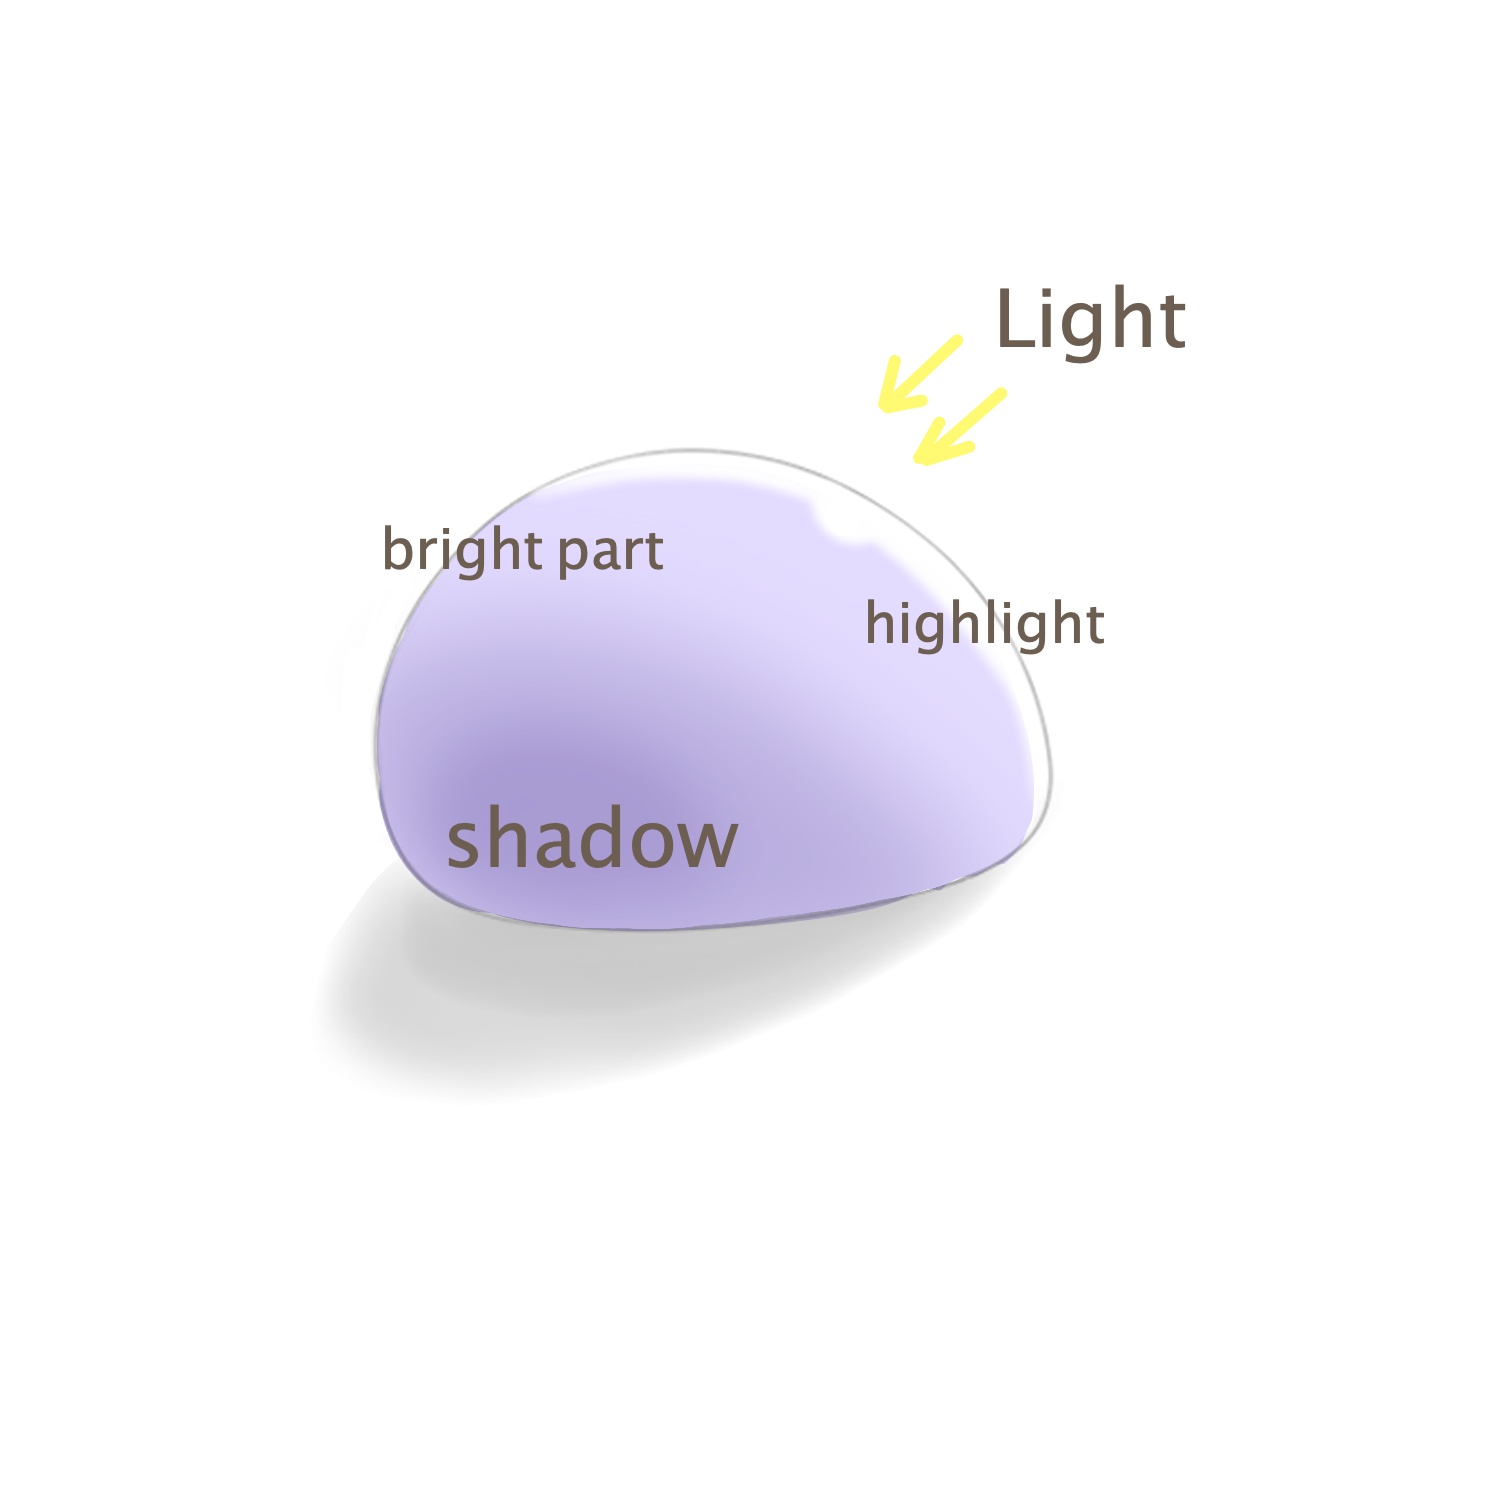
/highlight: lite source side
/brilliant part: towards the light source
/shadow: opposite from the low-cal source
[H2o drop]
/highlight: light source side
/vivid role: towards the opposite of the light source
/shadow: light source side
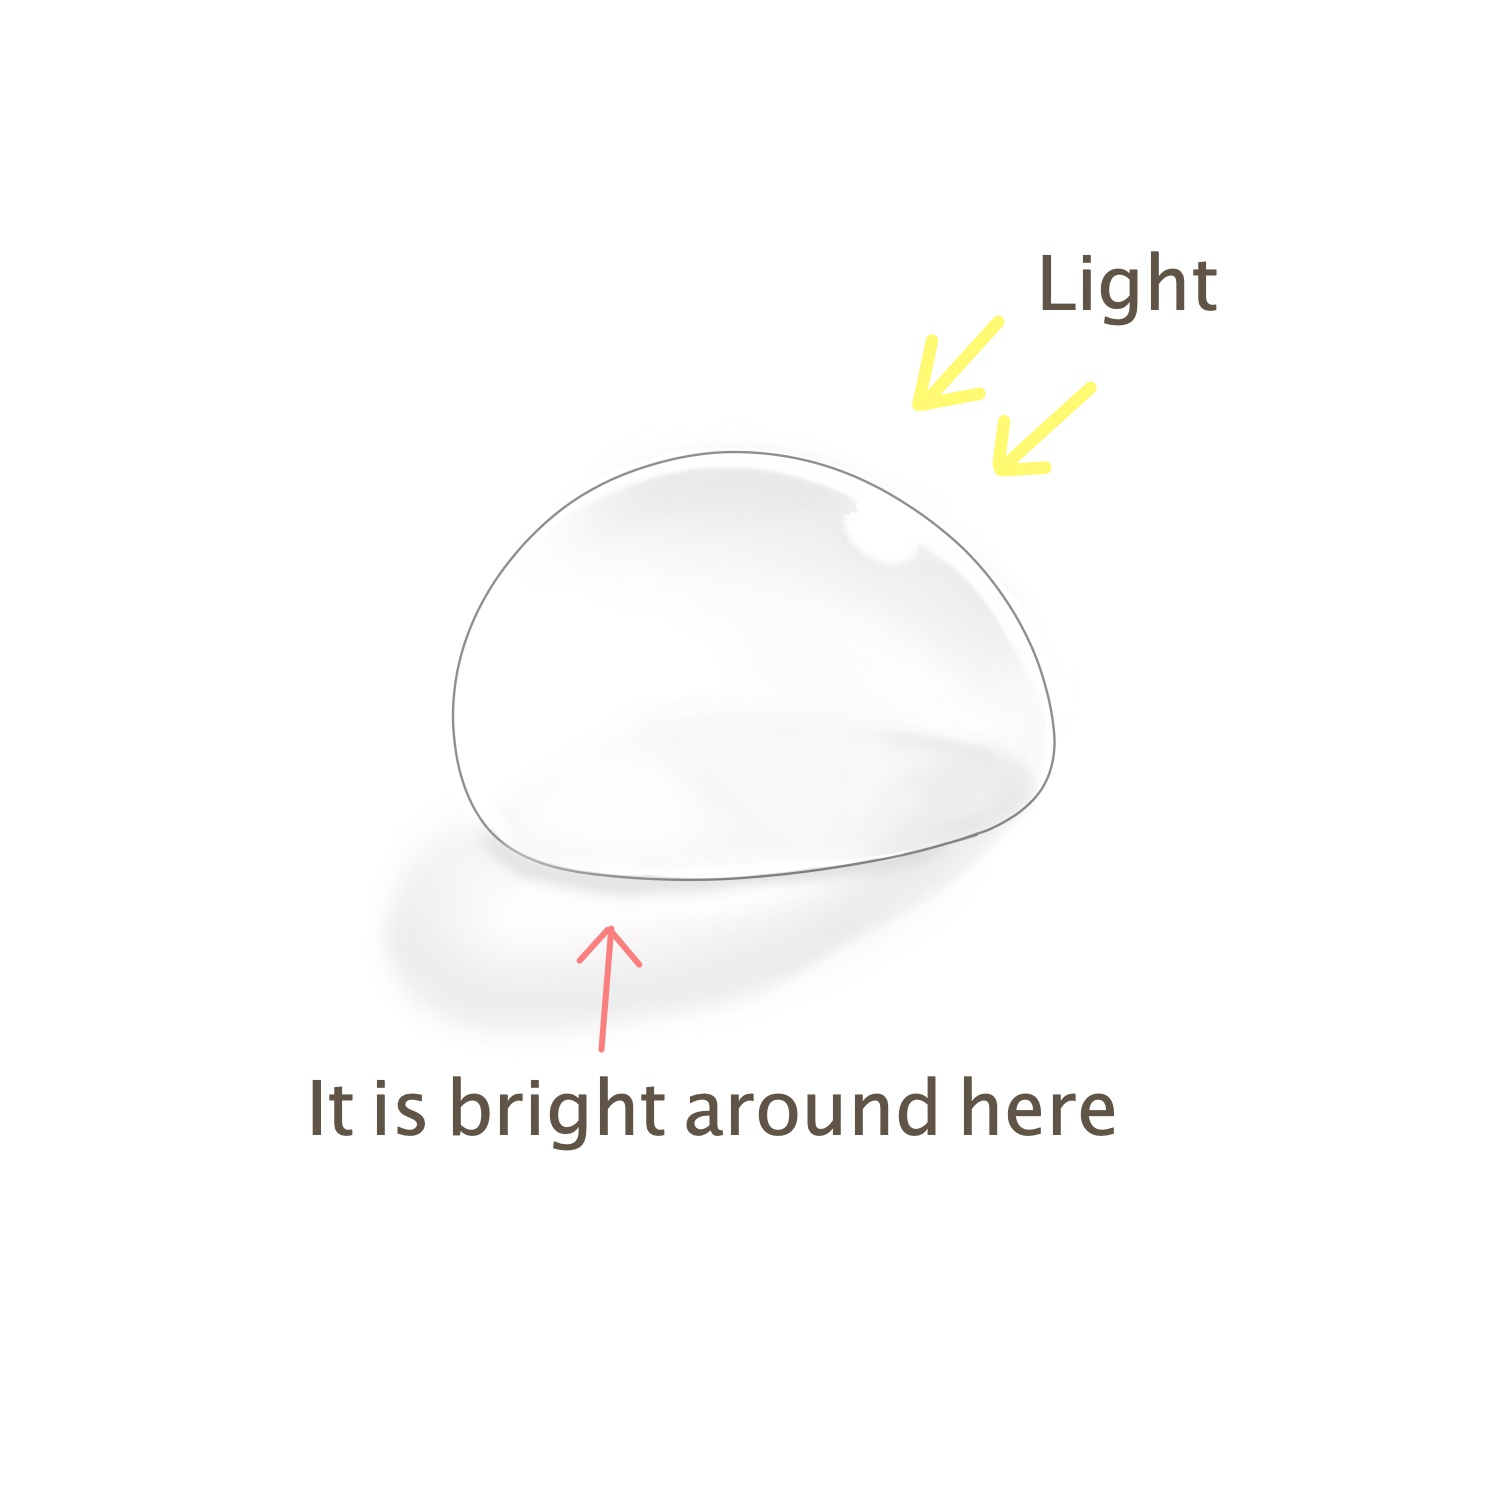
1-two.Reflection
On transparent water drops, objects nearby are reflected, and objects on the other side tin can be seen through.
Past thoroughly drawing the reflections, you can express the water drop trait more realistically, merely you lot can skip this depending on the taste of your analogy.
For simple drawings, yous can describe in a thick shadow on the inner side to express a water drop simply.
Depending on the taste, adjust how much you draw in.
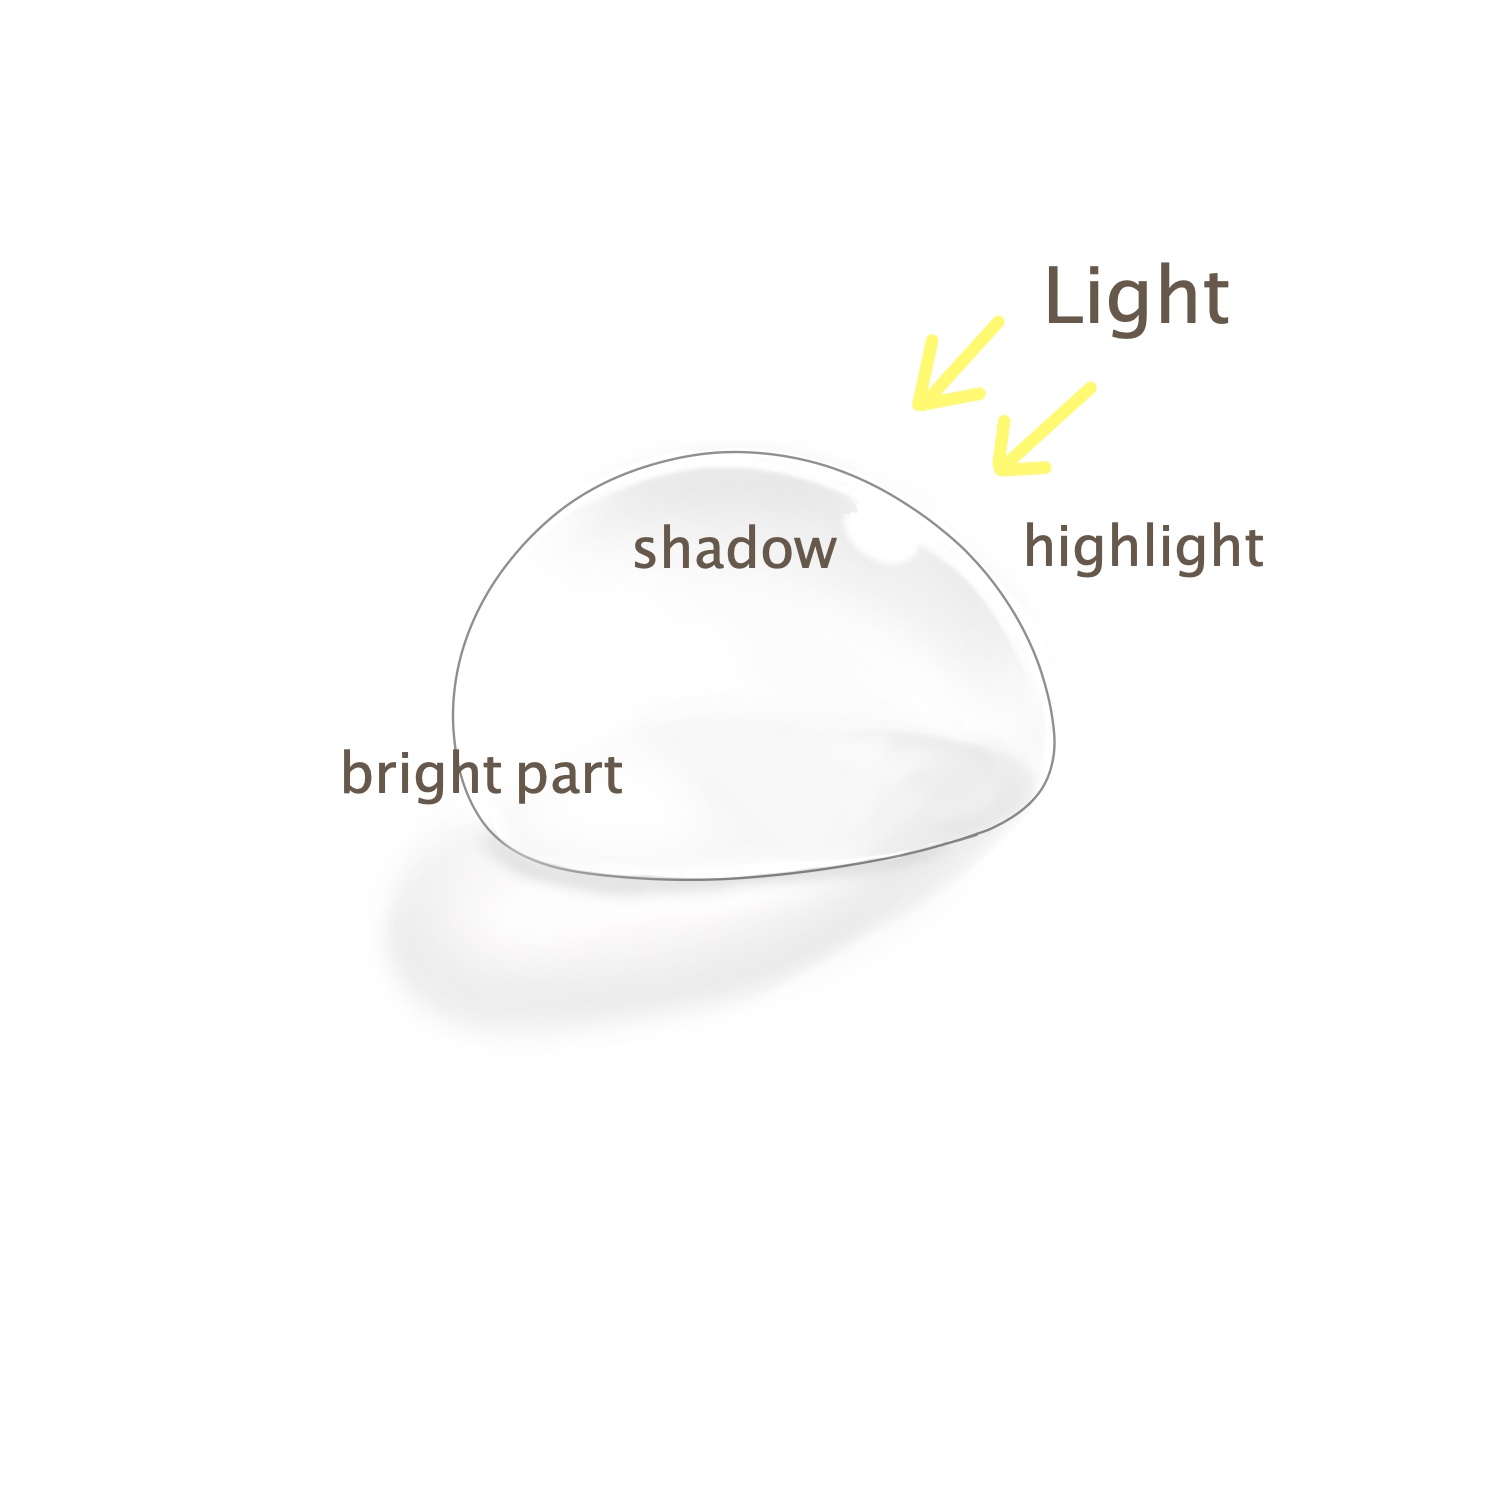
1-3.Depending on the conditions, the inner side of the shadow may be bright
Light does not pass through ordinary objects, so on the opposite side of the light source, nighttime shadow forms.
On the other paw, light passes through water drops, and so on the other side of the light source, a bright part may course on the shadow.
When the lite source is well-nigh right higher up, far away, or the light is weak, the shadow forms as usual, so y'all don't need to worry about information technology so much, but if you know about this, y'all can have more ways to express.
You lot tin can stress how transparent water drops are or stress the light, then it is also recommended for illustrations of shining morn dew.
2.How to draw water drops
Here, permit's expect at how to depict h2o drops.
[Basic cartoon techniques]
1.Depict the foundation with a somewhat thicker color than the base color
First, brand a new layer and identify it on top of the base layer.
After that, use a somewhat thicker colour than the base of operations color to draw the foundation on a new layer.
When yous select the foundation color, it is easy to select when you imagine "a little thicker color than before" of drawing paper or cloths when they get wet.

2.Draw in the shadow
Side by side, draw the shadow on the light source side.
Offset, make a new layer, place it on the foundation layer, and do clipping.
Next, choose a somewhat darker color than the foundation and utilize an airbrush to put in shadow on the low-cal source side.
When information technology's hard to fit, utilize a Gaussian Blur to go far fit the base.

3.Draw in the bright function
When you end cartoon the shadow, this time, you put in lite on the other side of the light source.
Select a somewhat brighter colour than the base color and draw in using an airbrush.
When you do this, it fits better if you use the Gaussian Blur after you draw in.
For this procedure, you can save time if you draw it in the aforementioned layer as the shadow, then employ Gaussian Blur at the point you finish drawing both the shadow and the light.
When yous separate the layers, retrieve to do clipping on the layer of the light side likewise.

4.Connecting the infinite between the shadow and the light
When you finished drawing the low-cal function, next, draw the space between the shadow and the calorie-free like connecting the ii.
Get-go, make a new layer on the foundation.
Next, use the Choice Color to option up the color of the border of the calorie-free and the foundation expanse, then use an airbrush to extend the colors to the area where you tin can see the foundation, making it be a gradation as you connect the colors to the shadow.

5.Insert light on the lite source side
This time, describe in light on the edge on the light source side.
Make a new layer at the very meridian and practise clipping. (It is fine to draw on the light layer also.)
From the calorie-free on the opposite side of the calorie-free source, choice up the brightest color, and use an airbrush to trace forth the wall of the water drop.

6.Insert highlights
On the light source side, use the pen tool to insert white highlights.

7.Add shadows
Finally, describe in shadow that forms under the water drop.
Brand a layer on the base layer and use an airbrush to describe in the shadow, then information technology's consummate.
For the shadow color, use Pick Color and pick up the darkest color of the shadow on the light source side.

Also, depending on the size of the bright part and shape of the highlight, the superlative and thickness of the waterdrop appear differently.
Make adjustments to lucifer the water drop you want to draw.

Flowing sweat and tears basically follows the same drawing techniques.
To make the part that starts to flow connect to the base well, the point is to use an airbrush to brand it fit.
(Sweat/tears)

Source: https://medibangpaint.com/en/use/2020/04/how-to-draw-water-drops/
Posted by: wilketherechat.blogspot.com
0 Response to "how to draw a water drop"
Post a Comment